Getting started: your first ten minutes
Create your account, choose how you unlock, pair your phone, turn on two-factor and add a recovery address, then send your first email and chat message.
This is the path from no account to first message sent, in the order the app itself suggests. Nothing here takes more than a couple of minutes. Where a step has its own article, follow the link for the details and screenshots.
You need a current browser with JavaScript on — see System requirements. You do not need a phone number or another email address, though a recovery address is strongly recommended (step 5).
1. Create your account
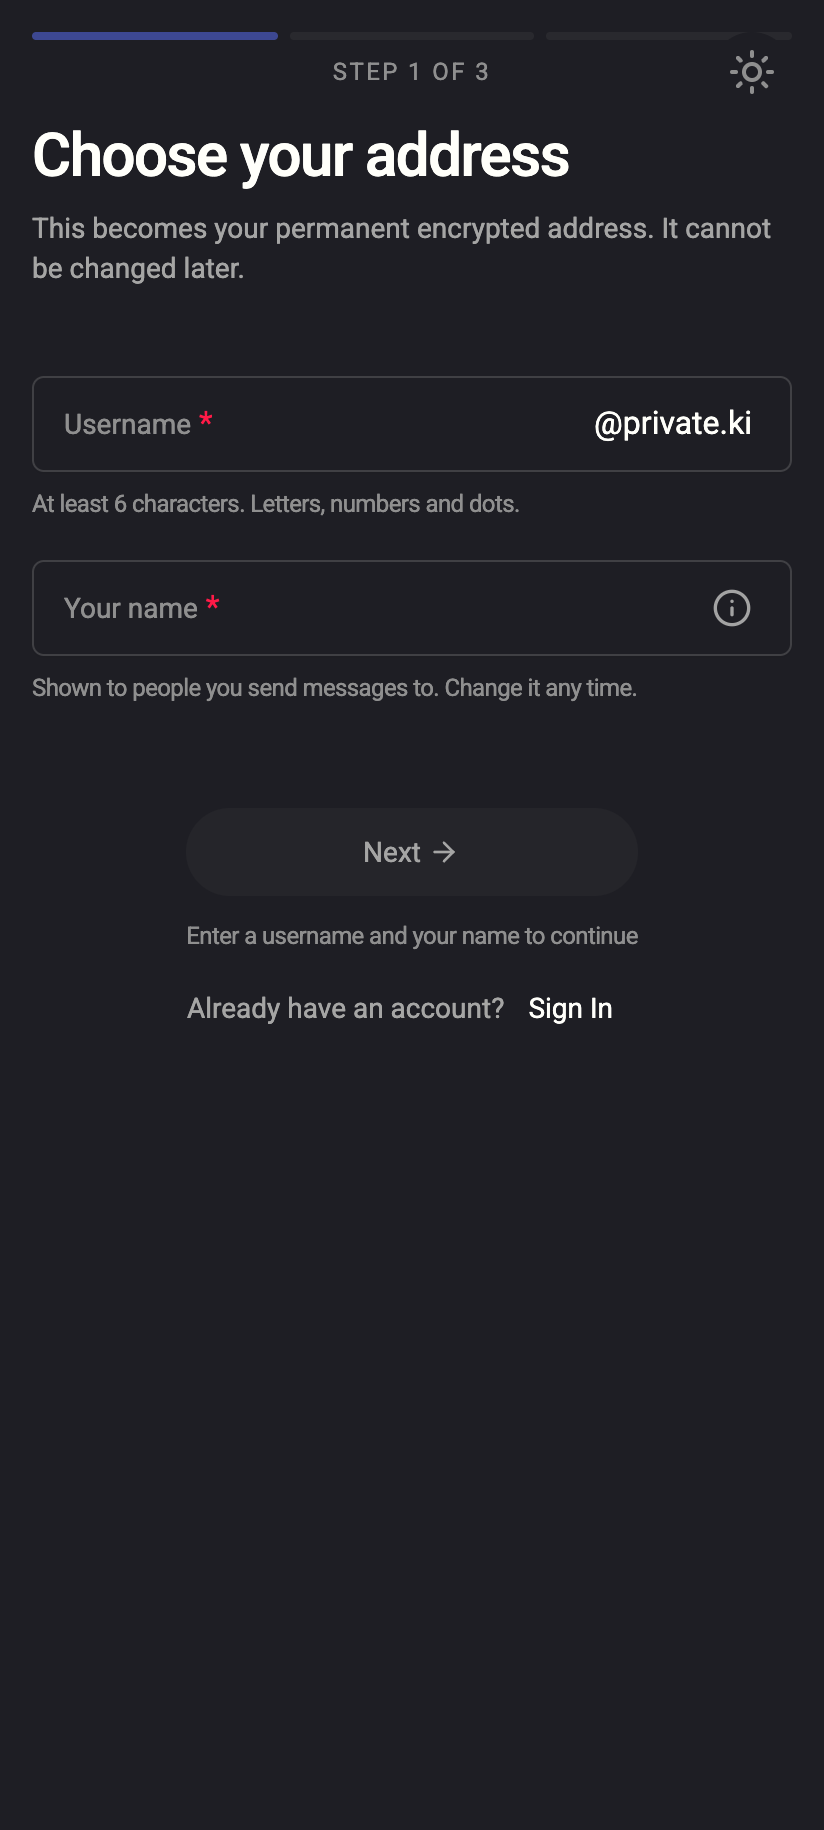
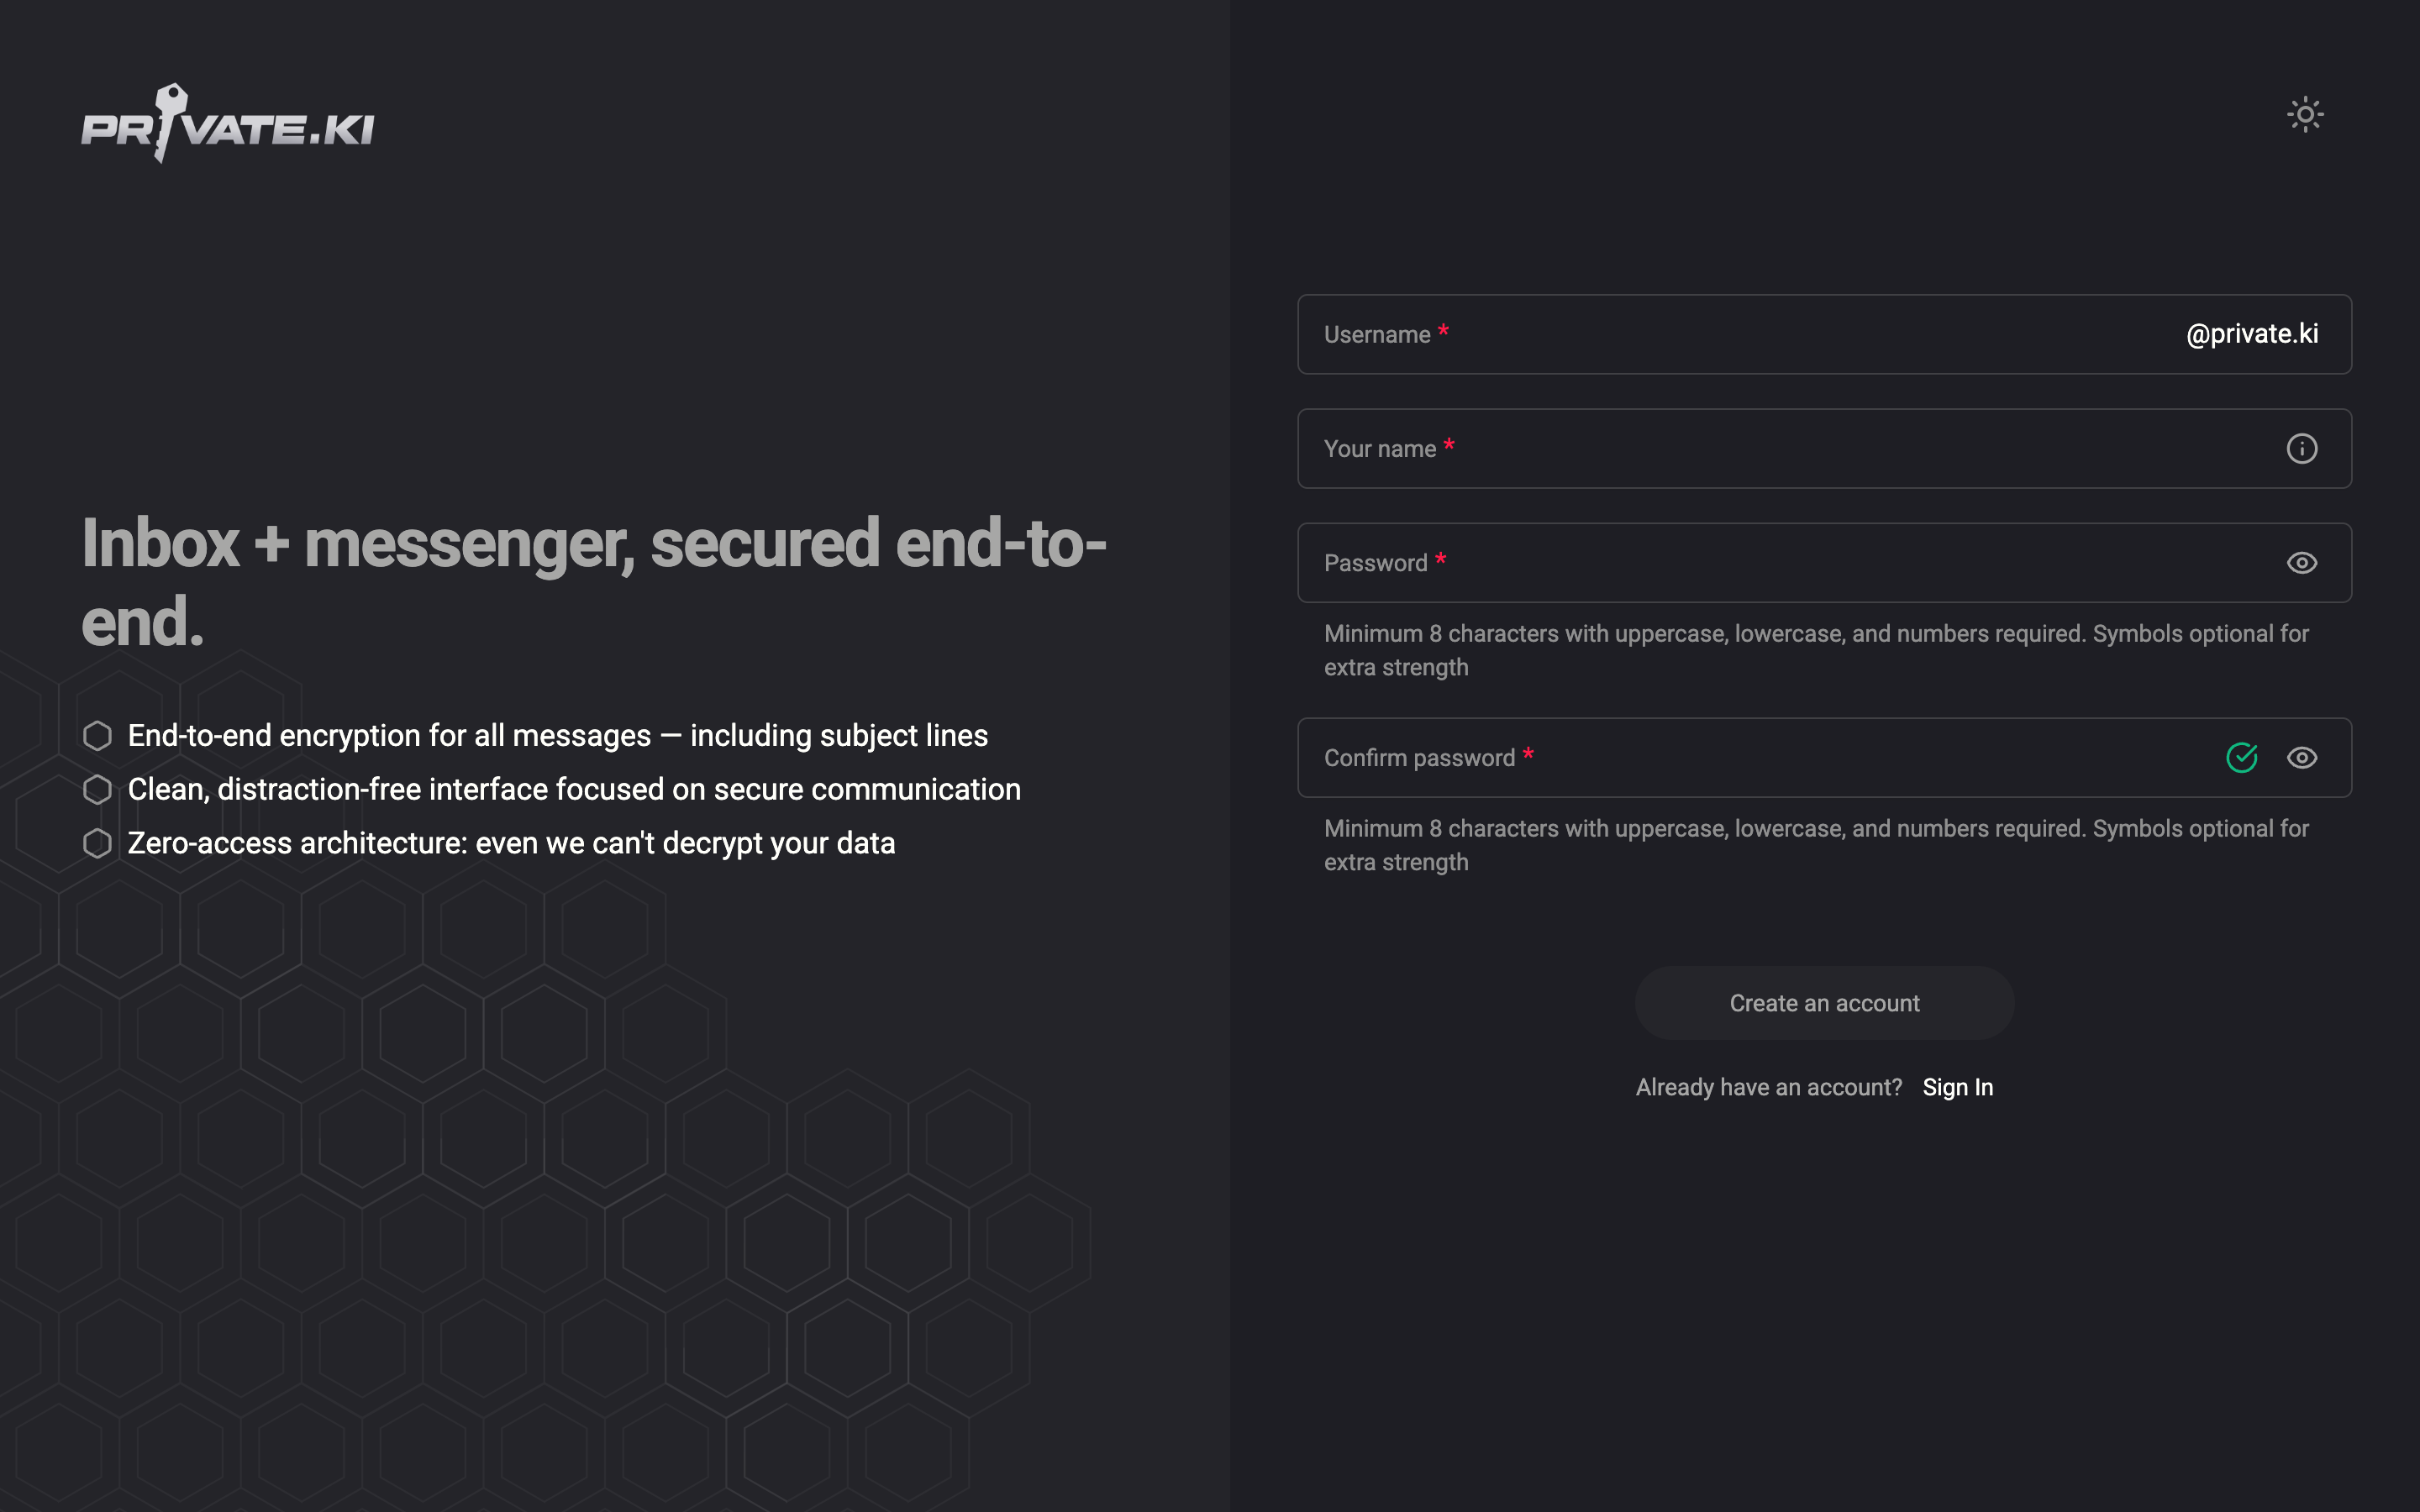
Open https://app.privateki.net and fill in the sign-up form: a username (6–30 characters, letters a–z, digits and dots — it becomes your @private.ki address), your name (what recipients see; you can change it later), and a password (at least 8 characters with upper case, lower case and a digit). Click Create an account.
Depending on how sign-ups are configured at the time, you may need an invitation link to register. If you arrived through a chat invite from a friend, the account is created as part of accepting it.
Full article: Create your account.
2. Choose how you unlock
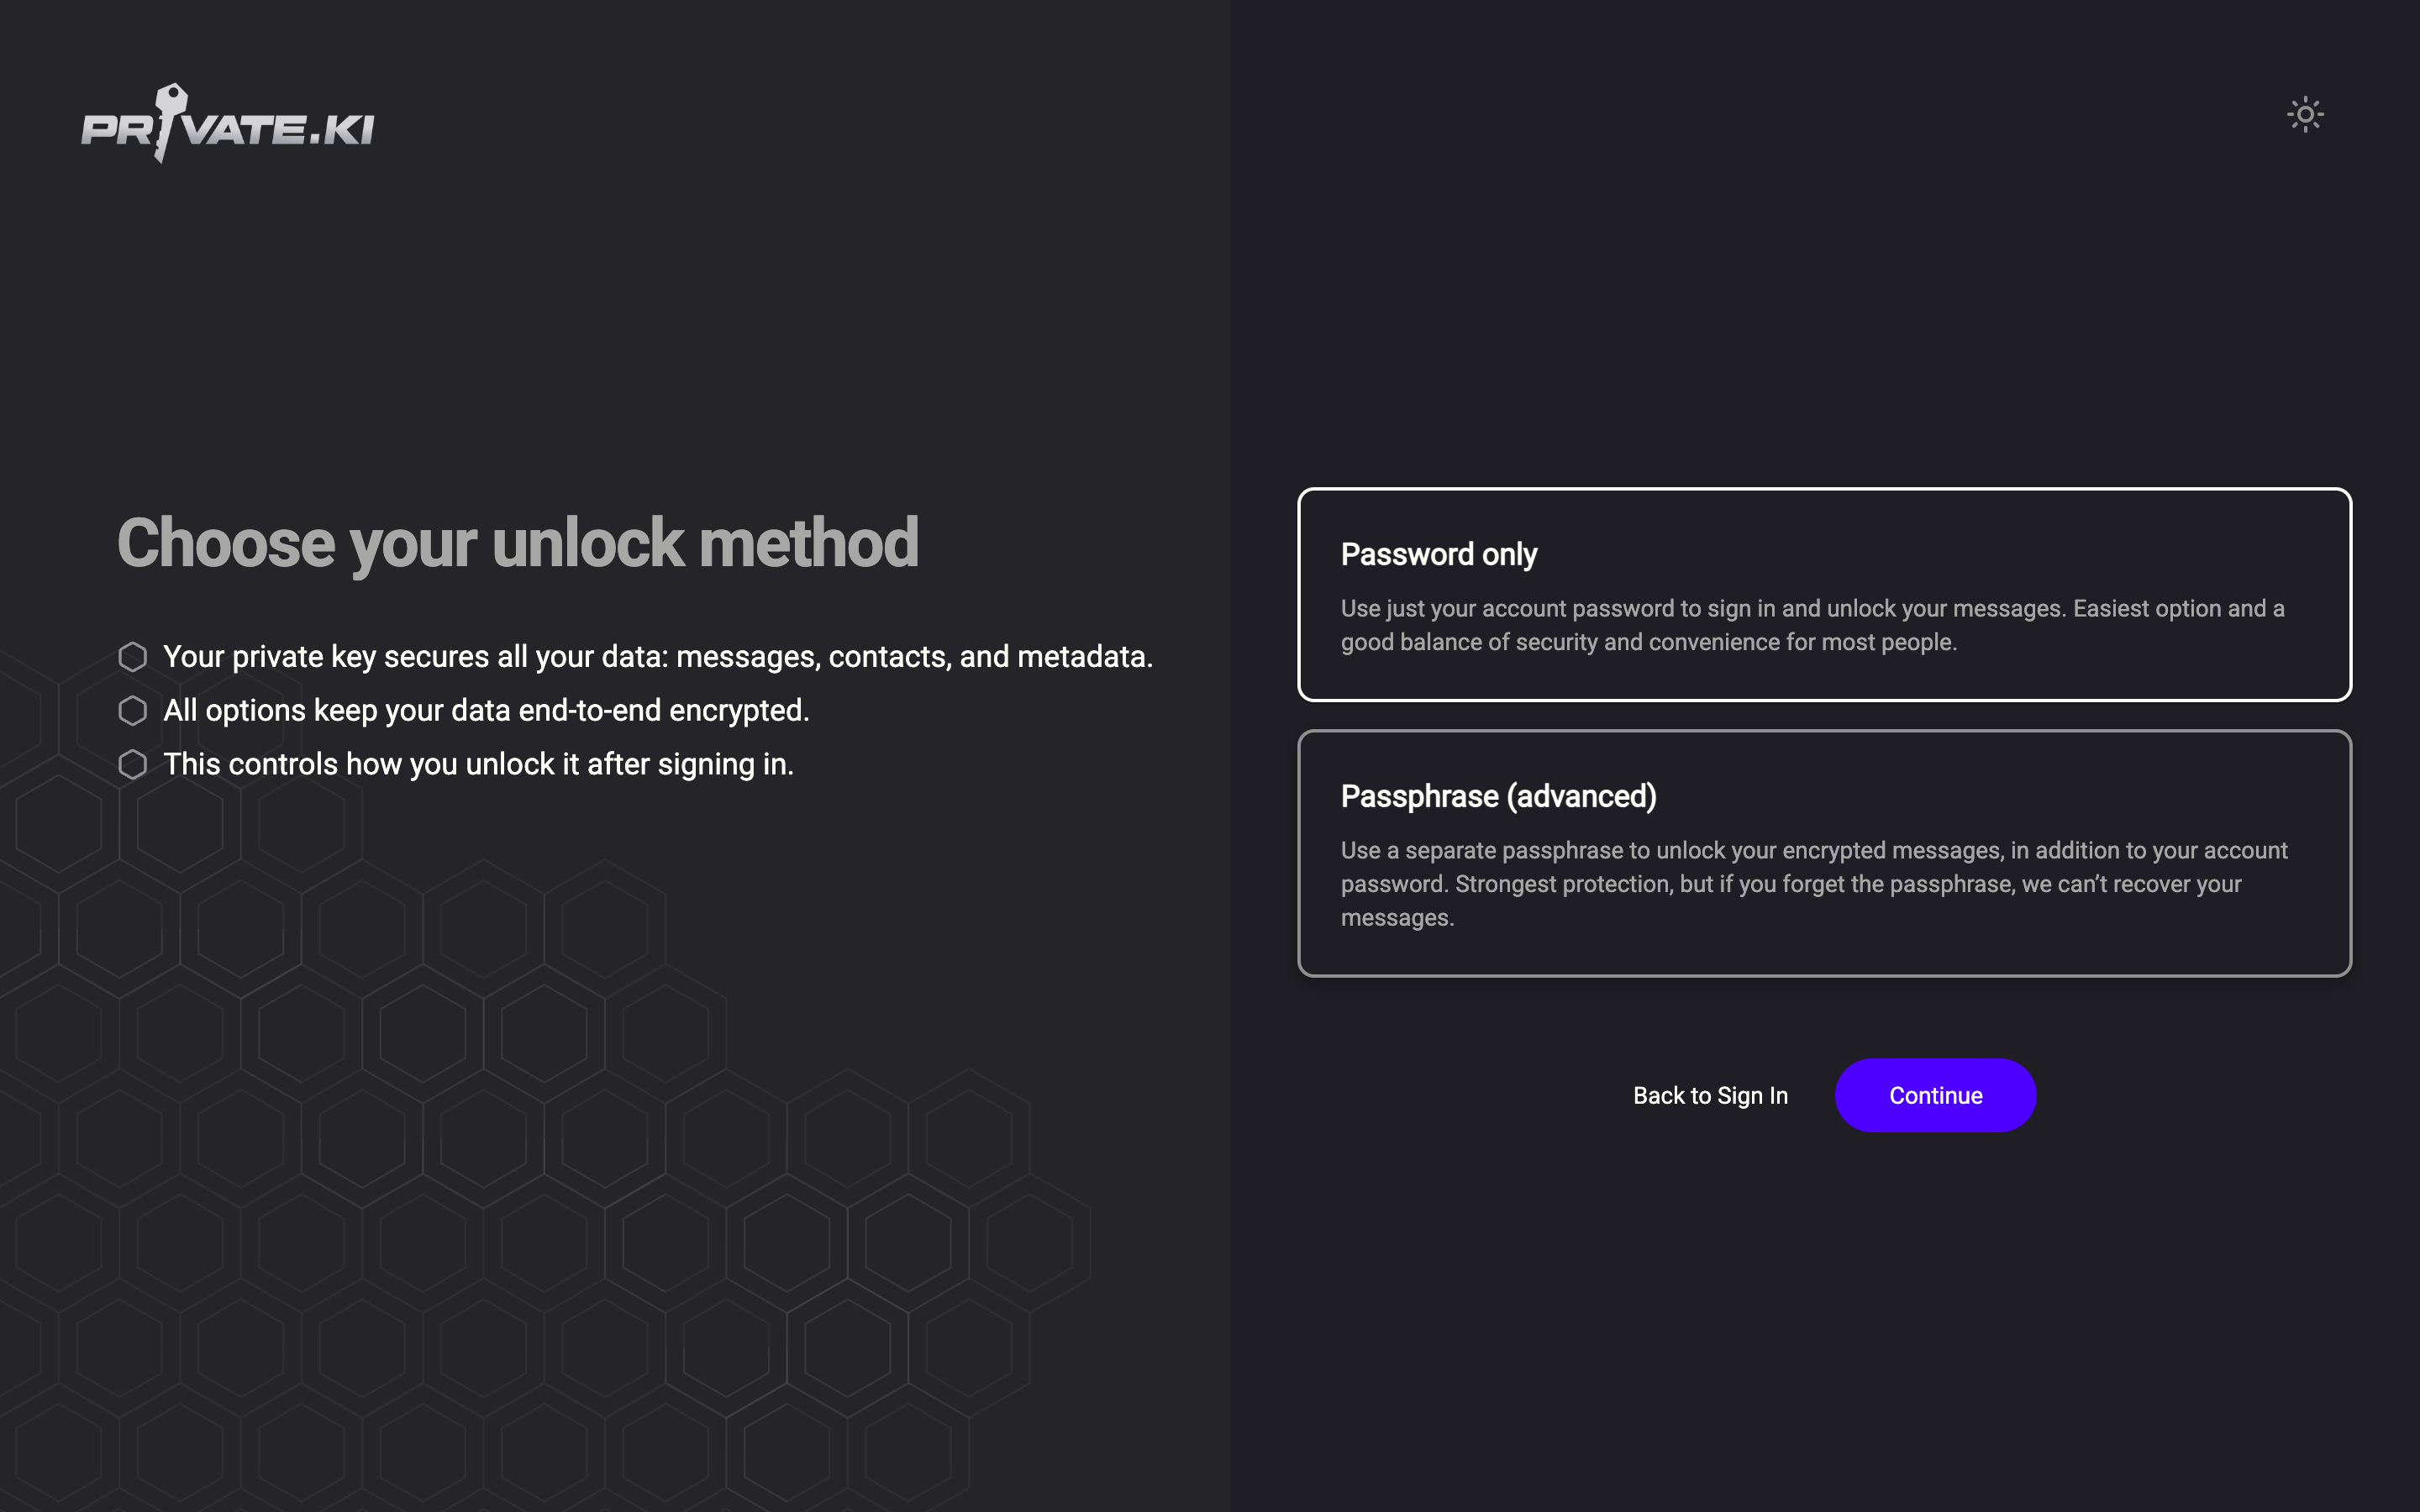
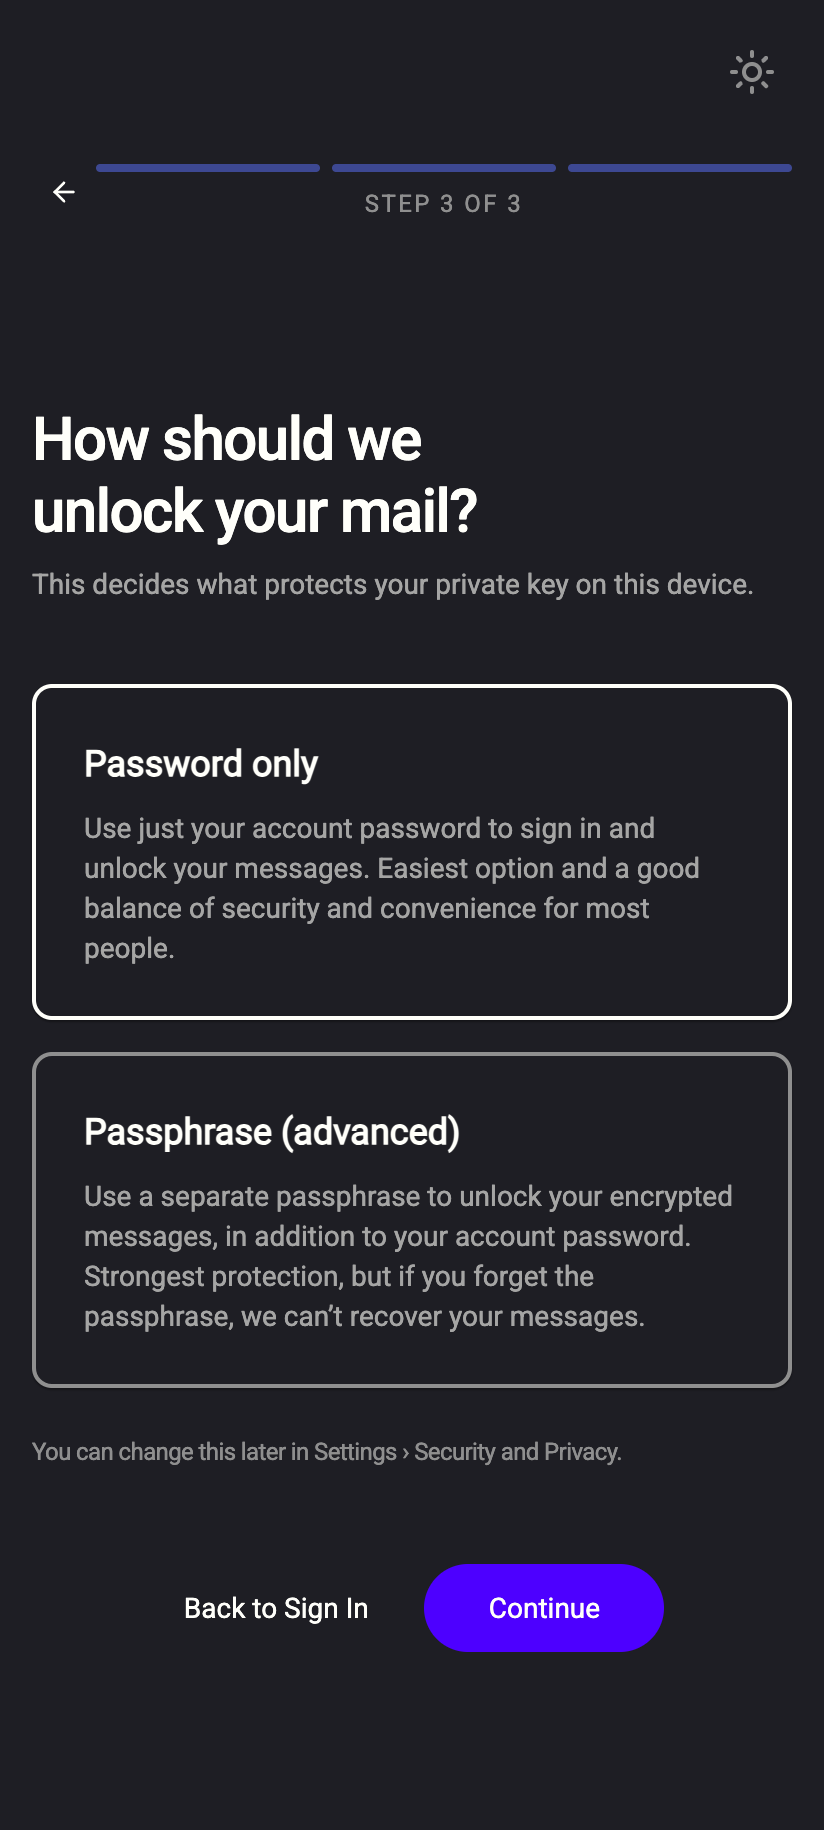
Your key pair is generated on your device next. First you choose what protects the private key:
- Password only — your password unlocks your mailbox when you sign in. Recommended for most people.
- Passphrase (advanced) — a separate passphrase you type after every sign-in. Strongest protection, and unrecoverable if you forget it. If you pick this, use Generate Passphrase, store the result in a password manager, and tick the acknowledgement before Confirm and create account.
 123123
Full article: Choose your unlock method. Why it matters: How encryption works.
Some accounts are asked to set up two-factor authentication or a recovery address at this point, before the mailbox opens. If you see that screen, it is steps 4 and 5 below, brought forward.
3. Pair your phone
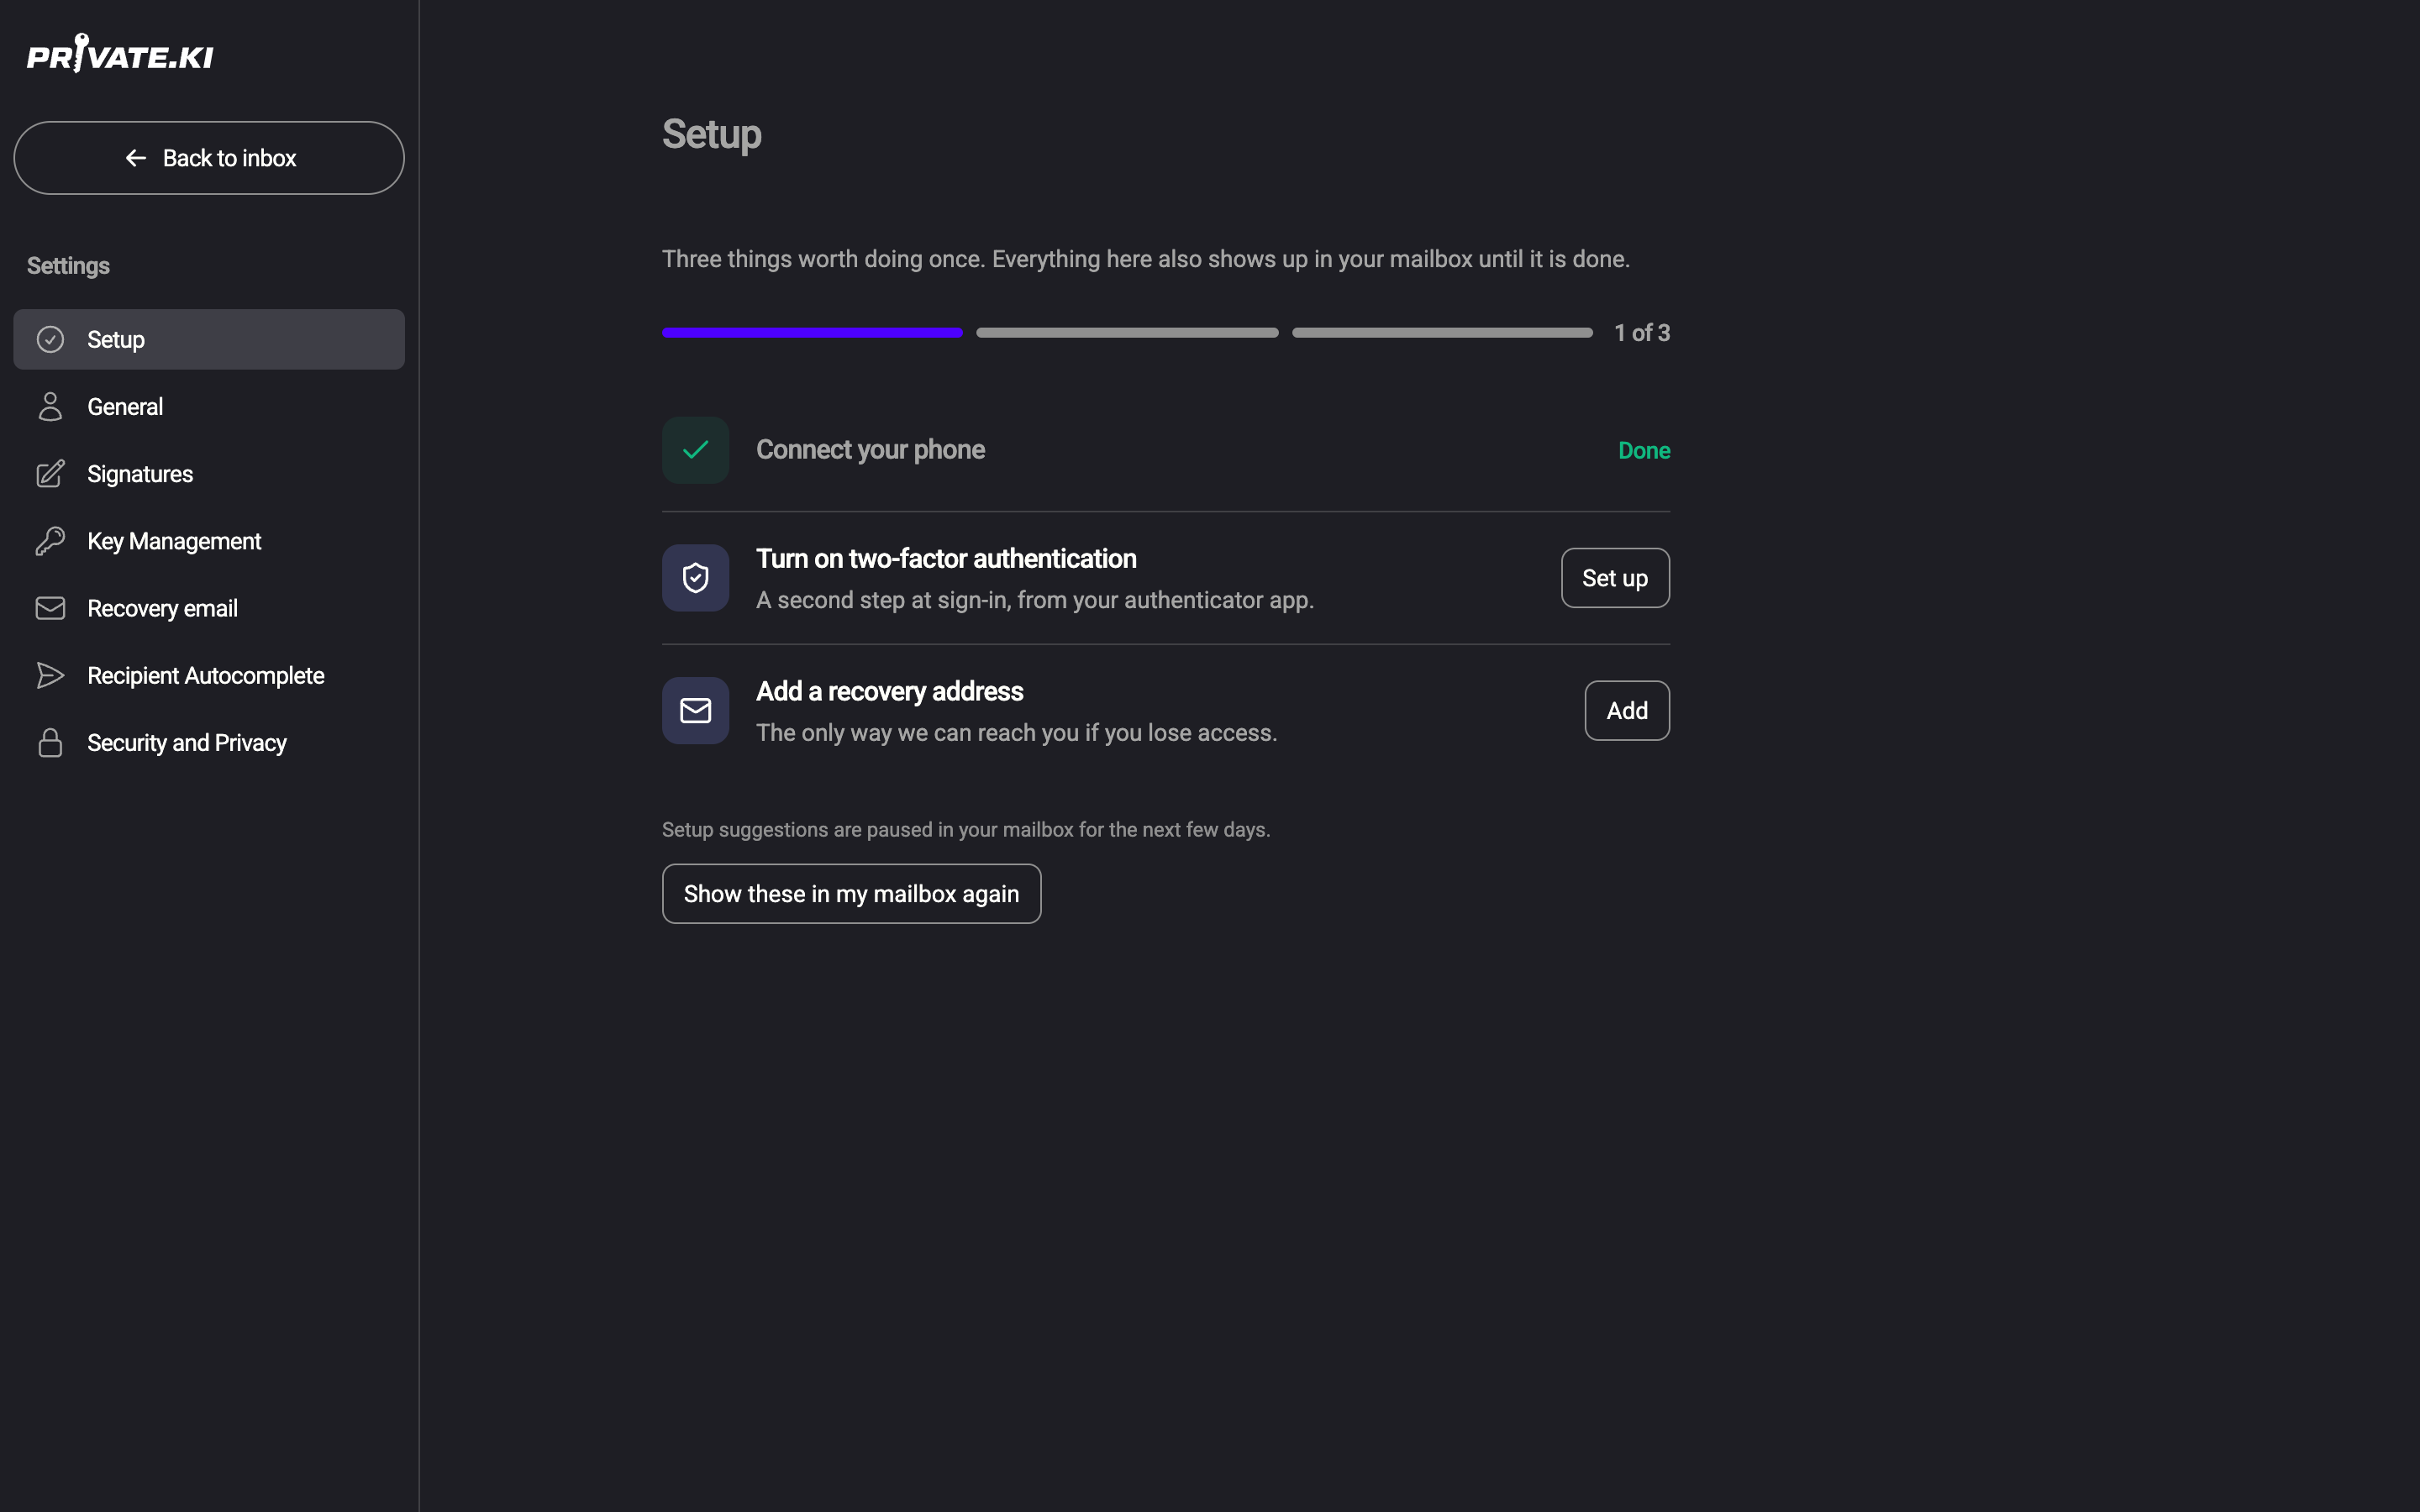
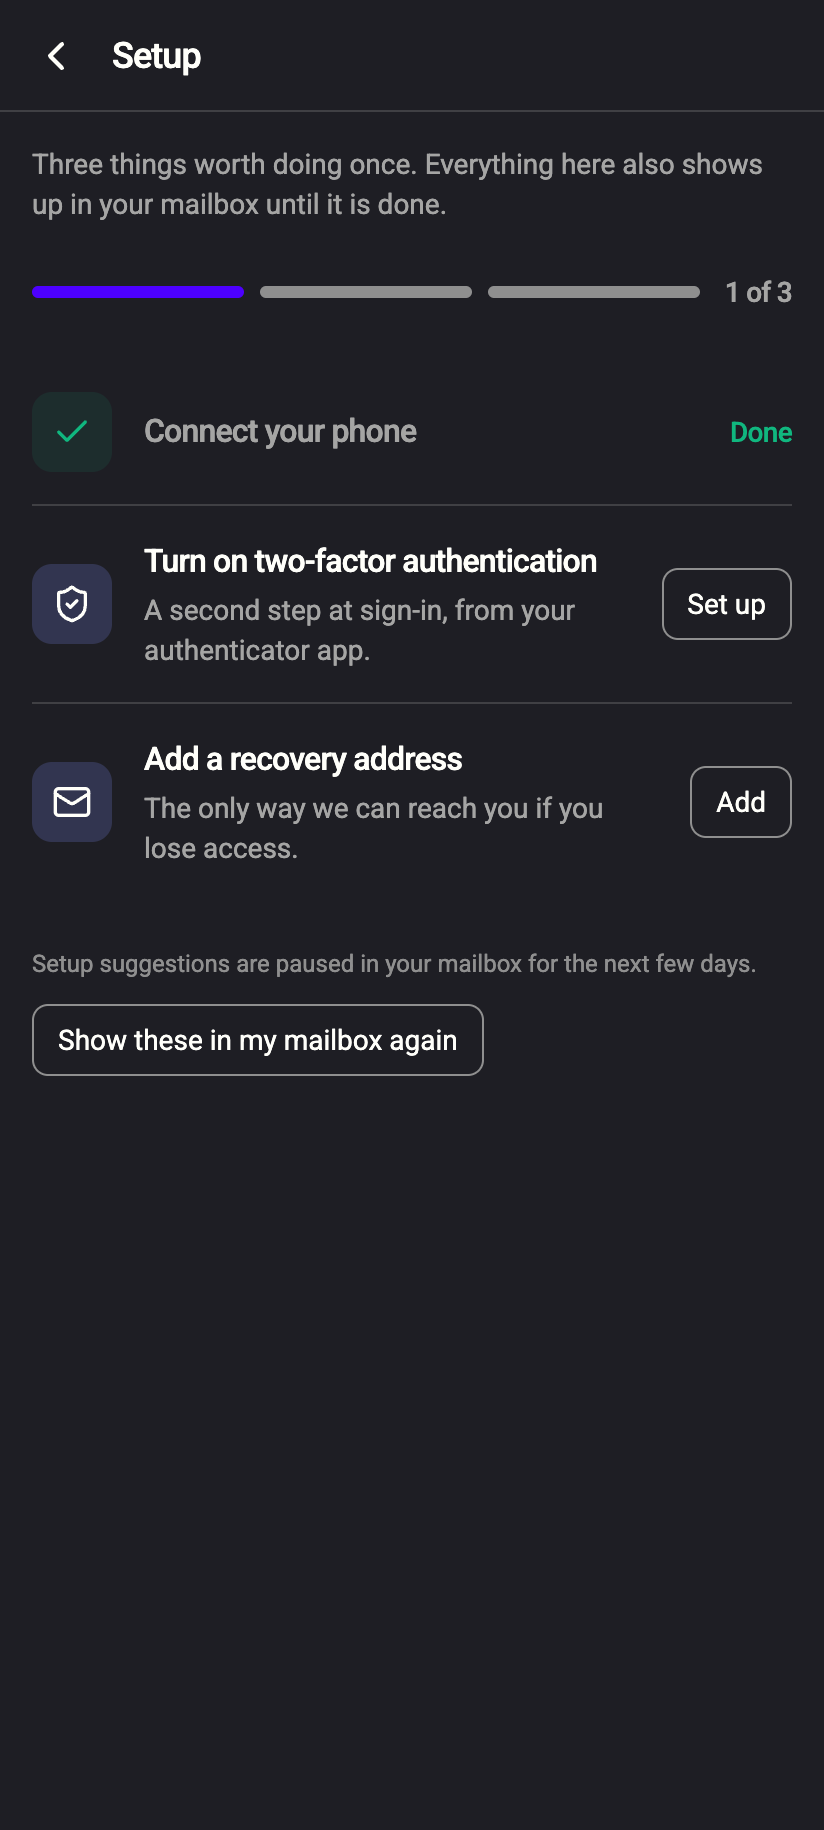
Your mailbox opens with a short Setup checklist — three items, each about a minute. It is also under Settings → Setup. In the mailbox you can dismiss it with Remind me later (it comes back in three days) or, once you have snoozed it before, Don’t show this again; the Setup page always lists the steps and lets you bring the reminder back with Show these in my mailbox again.
The first item is Connect your phone. Click Show QR, open https://app.privateki.net on your phone, choose Sign in with a QR code → Scan their code, and point the camera at your screen. Compare the short codes on both devices and approve. The phone is now signed in and unlocked without you typing anything on it.
 123123
Full articles: Setup checklist · Sign in with a QR code · Pair a second device.
4. Turn on two-factor authentication
Second item: Turn on two-factor authentication → Set up. Scan the QR code with any authenticator app, enter the six-digit code, and click Verify & Enable. From now on, sign-in asks for the current code after your password. There are no backup codes, so keep the authenticator app safe.
Full article: Set up two-factor authentication.
5. Add a recovery address
Third item: Add a recovery address → Add. Enter an email address you control, then the six-digit code we send there. This is the only way we can reach you if you lose your password. We store only a hash of the address — the app will ask you to type it again when it is needed rather than show it to you.
Full article: Set up a recovery email.
6. Send your first email
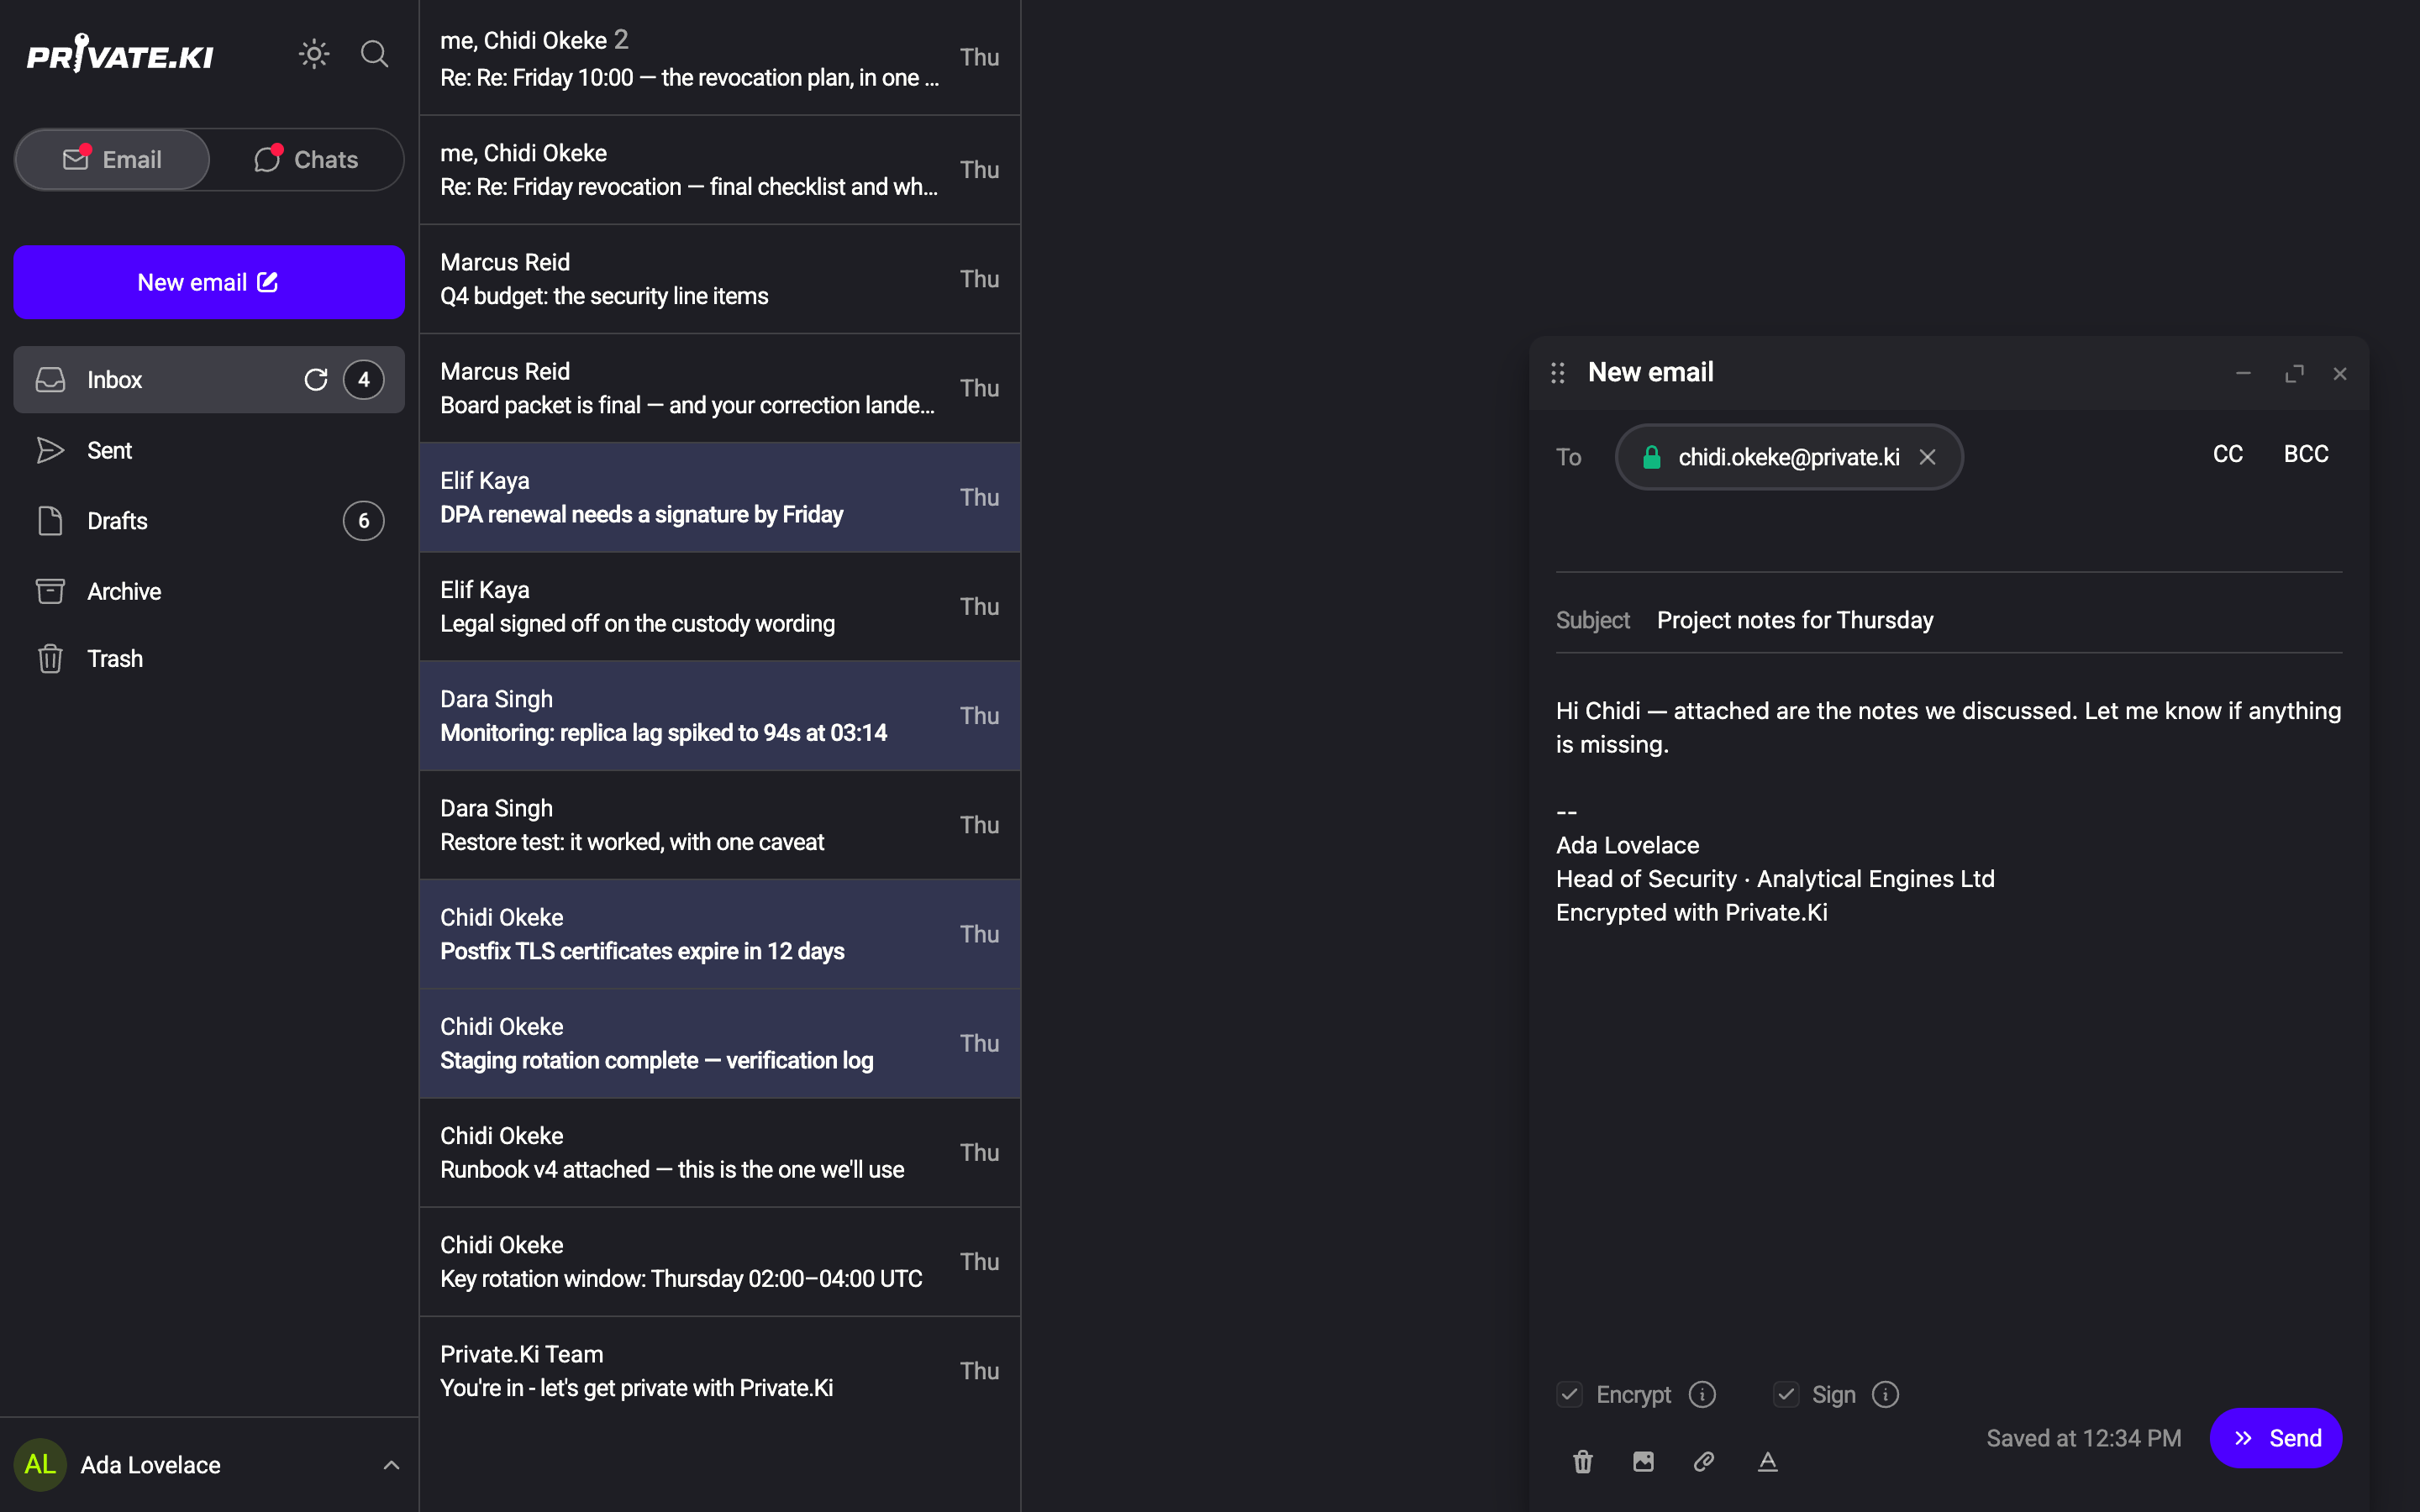
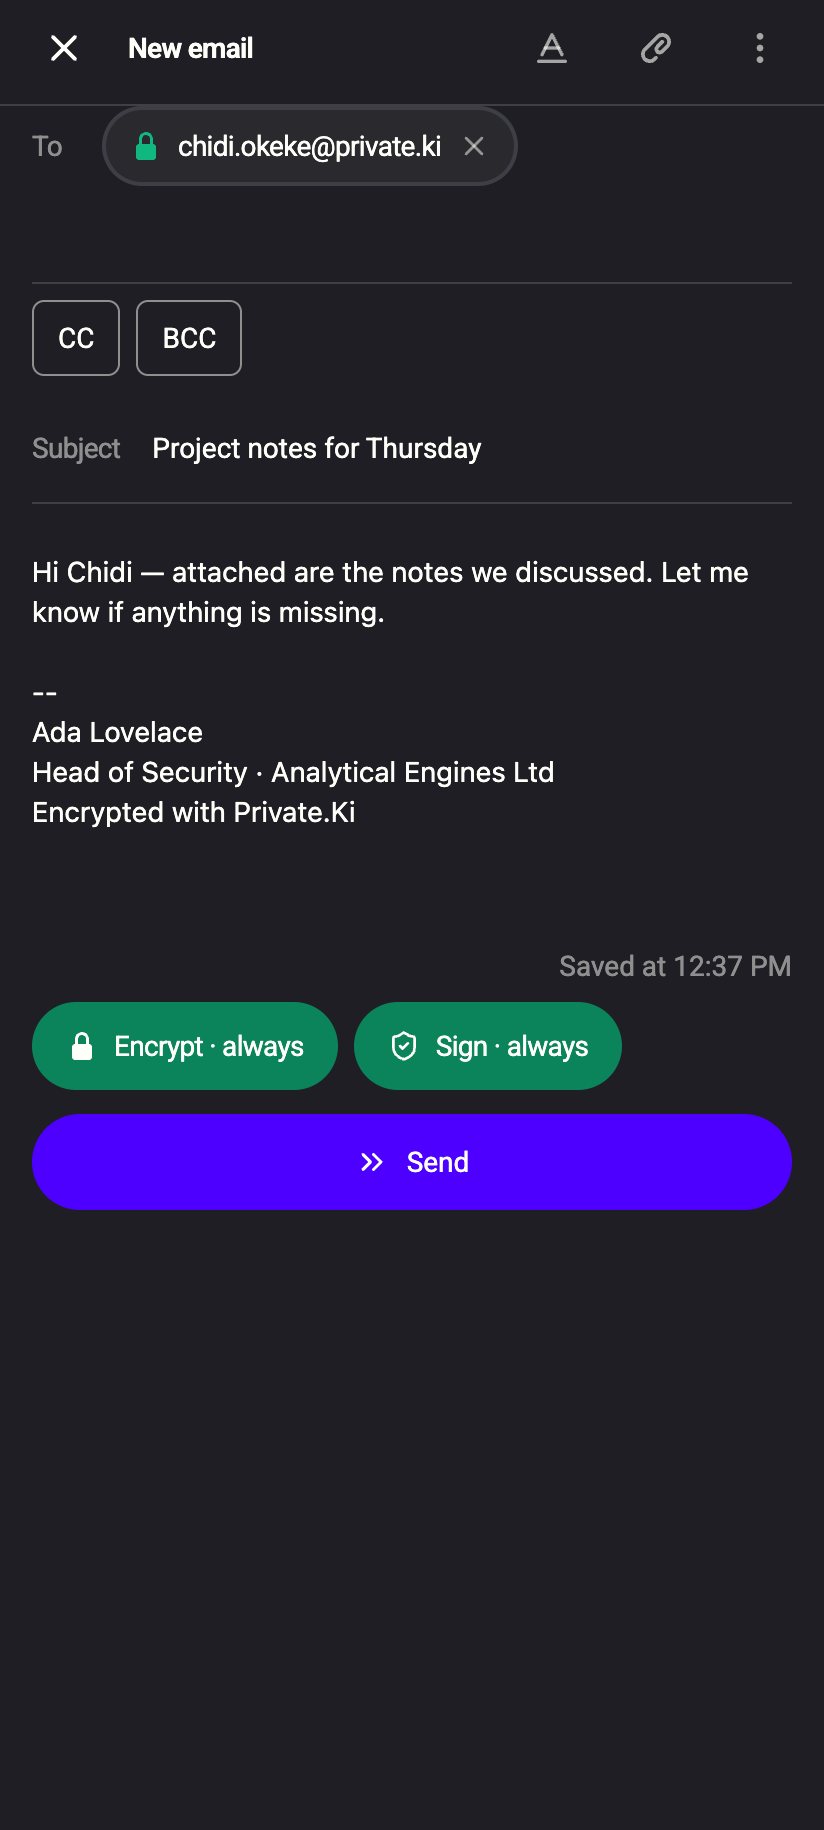
Click New email in the sidebar. Type a recipient — another Private.Ki address shows a green padlock, meaning the message will be end-to-end encrypted; an outside address is sent as ordinary email unless you have imported their key. Add a subject and text, attach up to 10 files of 25 MB each, and click Send. A toast lets you undo for a few seconds.
 1212
1212On the phone, tap the pencil button at the bottom-right. The composer opens full-screen.
Full articles: Compose and send · Undo send · Attachments.
7. Send your first chat message
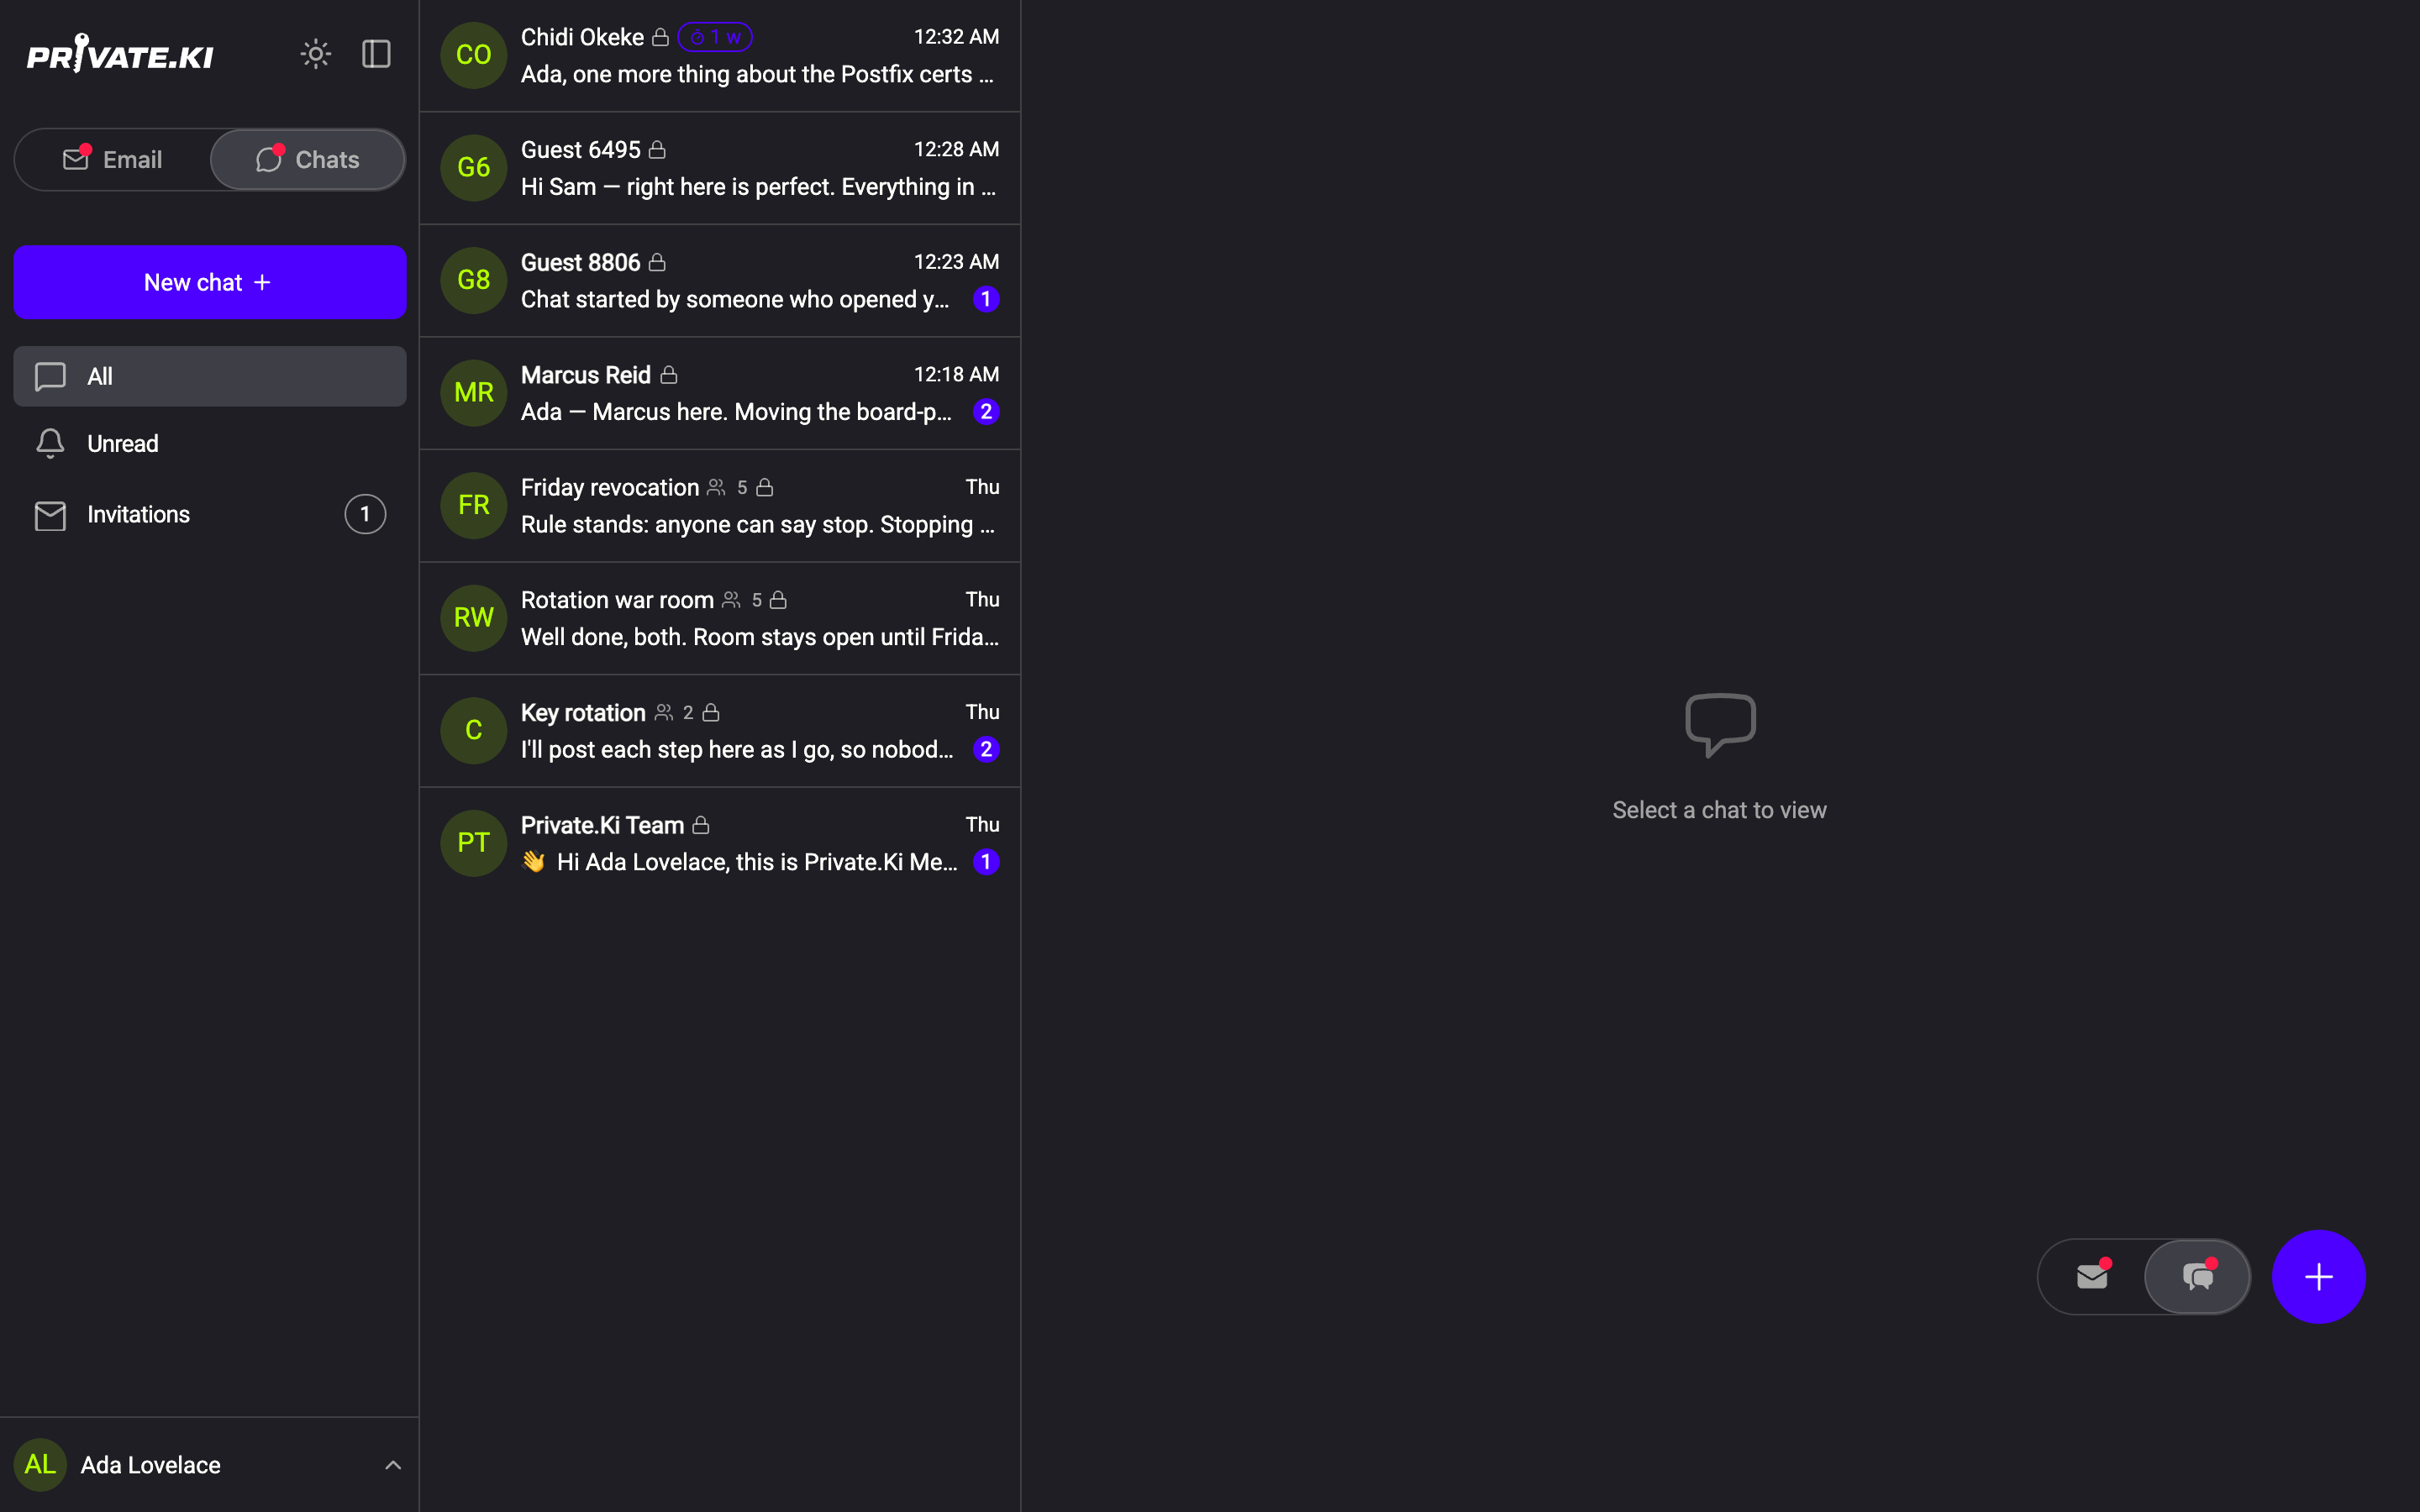
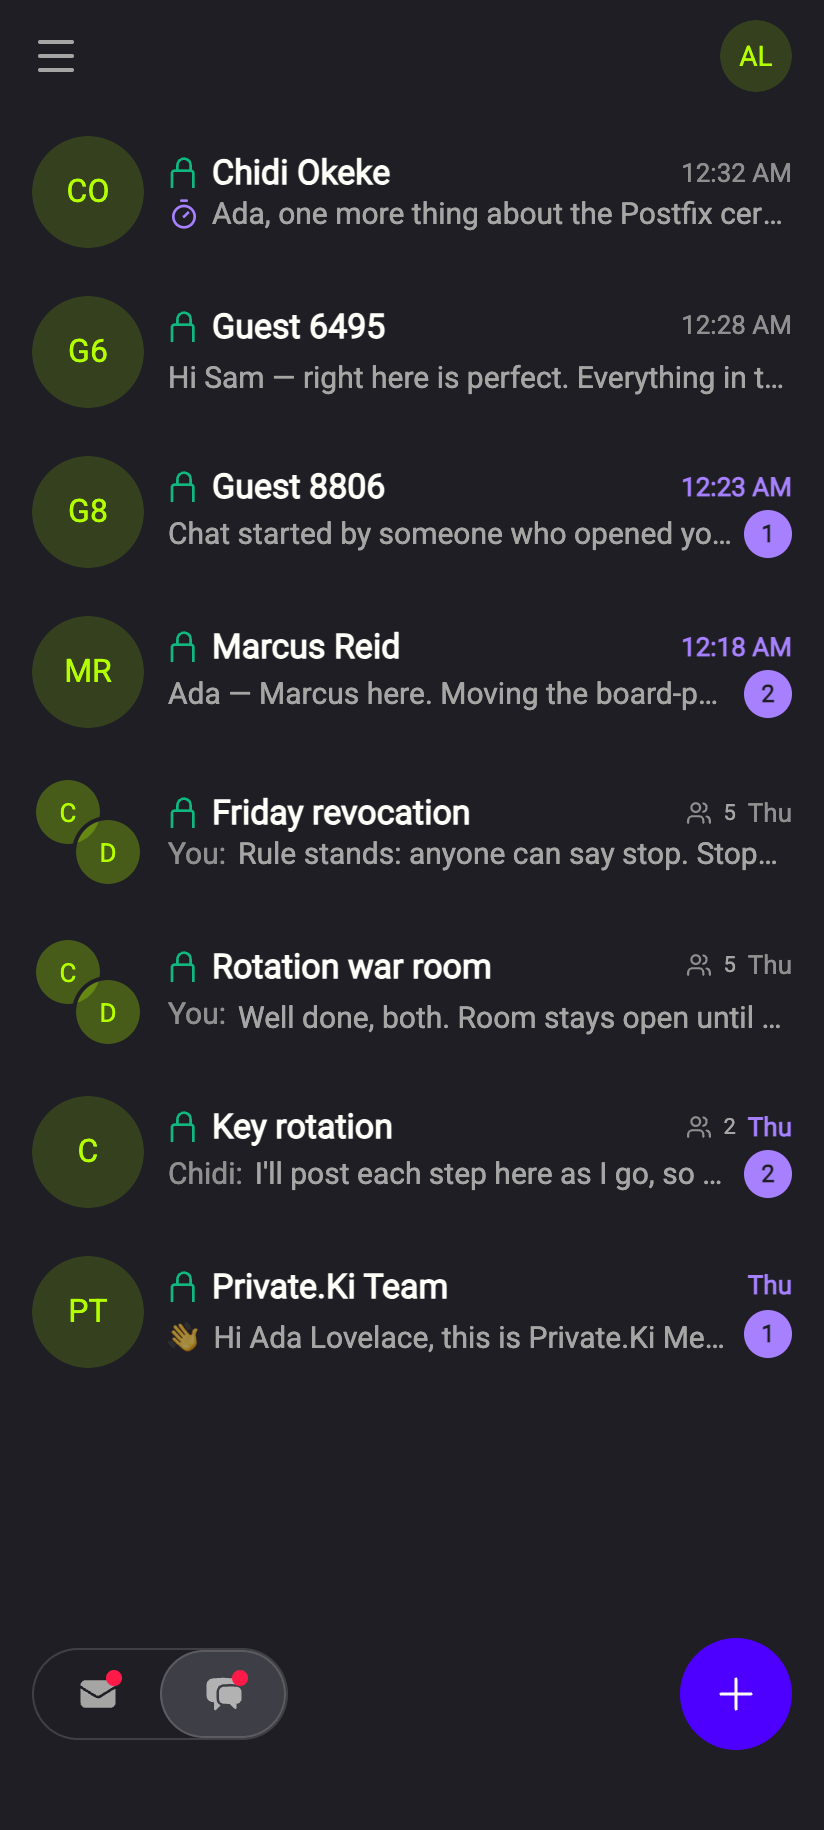
Switch to Chats with the toggle at the top of the sidebar. You already have one chat waiting: a welcome message from Private.Ki Team. To start your own, click New chat and enter a Private.Ki address — or an outside email address, in which case the app creates a single-use invite the other person can accept in a few taps. Type your message (up to 1000 characters) and press Enter — Shift + Enter adds a line break.
 1212
1212On the phone, tap the chat half of the floating switch at the bottom, then the + button.
Full articles: Start a chat · Invite someone outside Private.Ki · Switch between Email and Chats.
What to do next
- Set a default signature under Settings → Signatures — see Signatures.
- Pick a theme under Settings → General — see Theme and appearance.
- Learn what the padlock and shield icons on each message mean — see Security glyphs.
- On the web, learn the handful of keyboard shortcuts.
Common questions
Do I have to do all three Setup steps?
No, but each removes a way to lose access: the phone is a second signed-in device, 2FA stops a stolen password, and the recovery address is the only path to a password reset. The checklist stays in your mailbox until they are done or you snooze it.
I closed the passphrase screen before saving the passphrase
If the account was created, the passphrase you saw is the only one that opens it. If you did not save it, you cannot get in; create a new account. If you refreshed before finishing key setup, you are simply signed out — sign in again and continue.
Can I change my username later?
Only in limited circumstances, and it resets the account. See Change your username.